
This article is a chapter from the book Microservices Communication in .NET Using gRPC
Since gRPC is often used for processing large volumes of data inside a distributed application, this communication mechanism must be optimized for the best performance. In this chapter, we will cover some best practices when it comes to using gRPC on ASP.NET Core to optimize its performance as much as possible.
If you don’t know how to optimize gRPC for the best performance, you are running the risk of not being able to cope with the volume of data that your application is intended to process. Alternatively, you may need to scale your application out, which would require you to use additional software and hardware resources. If you are running your application under a cloud subscription, such as Microsoft Azure or Amazon AWS, unnecessarily scaling your application out will probably cost you some additional money. This is why it’s important to use gRPC to its maximum potential before scaling out is required.
In this chapter, we will cover the following topics:
- Why you need to reuse a gRPC channel
- How to not get held up by a concurrent stream limit
- Ensuring that your connection remains alive
- When streaming is better than individual calls
- Using binary payloads to decrease the data’s size
By the end of this chapter, you will have learned how to fine-tune your gRPC client and
server applications to make them suitable for optimally handling large amounts of data.
Technical requirements
To follow the instructions in this chapter, you will need the following:
- A computer with either the Windows, Mac, or Linux operating system installed
- A supported IDE or code editor (Visual Studio, Visual Studio Code, or JetBrains Rider)
- .NET 5 SDK (or newer)
A self-signed development HTTPS certificate enabled on the machine
The instructions for how to set all of these up were provided in Chapter 1, Creating a Basic
gRPC Application on ASP.NET Core.
All of the code samples used in this chapter can be found in this book’s GitHub repository:
Please visit the following link to check the CiA videos: https://bit.ly/3m1Eg7I
Why you need to reuse a gRPC channel
When you connect the gRPC client to the server, you do so via a configurable channel. When the channel is opened, the following things happen:
- A socket is opened
- The TCP connection is established
- Transport Layer Security (TLS) is negotiated and applied
- An HTTP/2 connection is started
Once these steps have been completed, gRPC calls can be made to the server.
Because opening a channel requires all these steps to take place, which represent multiple roundtrips to the server, it’s better to reuse the channel while you can. If you already have an existing channel open, you can start making gRPC calls on it right away. However, if you recreate the channel every time you make a call, you will need to perform all these steps every single time. If you need to make many calls, this may slow down your system substantially.
In C#, the gRPC channel is represented by the GrpcChannel class from the Grpc.Net.Client namespace. An object of this type needs to be reused rather than an implementation of the gRPC client.
The gRPC client’s implementation is nothing but a thin layer of abstraction around the Protobuf definition. It’s there merely to provide strongly typed representations of the Protobuf RPCs that you can call. All the heavy lifting is done by GrpcChannel.
Therefore, it doesn’t matter if we reuse the client object or instantiate a new one every time we need to make a call. What matters is that we reuse the channel if we can. Let’s set up some gRPC server and client applications to see how the channel object can be reused.
Setting up the server application
First, we need to create a solution that will hold both our client and server applications, along with their shared gRPC dependencies. To do so, we’ll create a folder called GrpcBestPractices and run the following command inside it to create a solution with the same name:
dotnet new sln
Then, while still in the same folder, we will create a gRPC service application by executing the following command:
dotnet new grpc -o PerformanceService
Then, we will add the newly created project to the solution by executing the following command:
dotnet sln add PerformanceService/PerformanceService.csproj
Now, we will add a console application that will hold the shared gRPC dependencies between the client and the server.
Adding a library with shared Protobuf dependencies
We can create a shared library project by executing the following command:
dotnet new classlib -o GrpcDependencies
We can add this project to our solution by executing the following command:
dotnet sln add GrpcDependencies/GrpcDependencies.csproj
Now, let’s add all the required NuGet dependencies to our shared class library project. We can do so by navigating to the GrpcDependencies project folder and executing the following commands:
dotnet add GrpcDependencies.csproj package Grpc.Net.Clientdotnet add GrpcDependencies.csproj package Google.Protobufdotnet add GrpcDependencies.csproj package Grpc.Toolsdotnet add GrpcDependencies.csproj package Grpc.AspNetCore
Now, we will add a Protobuf definition to our shared library. To do so, we will create a Protos folder inside the GrpcDependencies project folder and add a performance.proto file to it. The content of this file will be as follows:
syntax = "proto3";
package performance;

service Monitor {
  rpc GetPerformance (PerformanceStatusRequest) returns
    (PerformanceStatusResponse);
}

message PerformanceStatusRequest {
  string client_name = 1;
}

message PerformanceStatusResponse {
    double cpu_percentage_usage = 1;
    double memory_usage = 2;
    int32 processes_running = 3;
    int32 active_connections = 4;
}
It’s a simple service definition with a single unary RPC called GetPerformance. The service that we are building is emulating a performance monitor. It receives a request with a client name, and it returns performance statistics, including CPU and memory usage, the number of active processes that are running, and the number of active connections.
But don’t worry. We won’t have to be monitoring a actual system. We are purely emulating these statistics for demonstration purposes. To finish off our reference library, we need to insert the following section anywhere inside the element in the GrpcDependencies.csproj file:
<ItemGroup>
    <Protobuf Include="Protos\performance.proto" />
</ItemGroup>
This project now contains all the gRPC dependencies that both the server and the client applications need. Therefore, it’s no longer essential to have them explicitly defined in either of those projects. Now, we will add this library to our server project while removing all the redundant dependencies from it.
Adding a shared Protobuf library to the server project Inside GrpcBestPractices, navigate to the PerformanceService project folder and replace the content of the PerformanceService.csproj file with the following:
<Project Sdk="Microsoft.NET.Sdk.Web">
  <PropertyGroup>
    <TargetFramework>net5.0</TargetFramework>
  </PropertyGroup>
  <ItemGroup>
    <ProjectReference
      Include="..\GrpcDependencies\GrpcDependencies.csproj" />
  </ItemGroup>
</Project>
Now that all the necessary dependencies are in place, we are ready to implement the server-side components for our solution. But first, we need to remove the auto-generated gRPC service implementation for the default greet.proto file. As we no longer use this file, we will need to remove the GreeterService.cs file from the Services folder inside the PerformanceService project folder. Otherwise, we will get a compiler error.
Implementing server-side gRPC components
Once we’ve deleted all the redundant files, we can put the PerformanceMonitor.cs file in its place. The content of this file will be as follows:
using System;
using System.Threading.Tasks;
using Grpc.Core;
using Performance;
namespace PerformanceService
{
    public class PerformanceMonitor : Monitor.MonitorBase
    {
        public override Task<PerformanceStatusResponse>
          GetPerformance(PerformanceStatusRequest request,
            ServerCallContext context)
        {
            var randomNumberGenerator = new Random();
            return Task.FromResult(new
 PerformanceStatusResponse
            {
                CpuPercentageUsage = randomNumberGenerator.NextDouble() * 100,
                MemoryUsage = randomNumberGenerator.NextDouble() * 100,
                ProcessesRunning = randomNumberGenerator.Next(),
                ActiveConnections = randomNumberGenerator.Next()
            });
        }
    }
}
Essentially, the implementation of the GetPerformance RPC accepts a request from the client and returns a single response with emulated performance statistics. All of these statistics are completely random numbers.
Now, we need to register this gRPC service implementation. To do so, we need to open the Startup.cs file inside the project folder and, inside the Configure method, locate a call to UseEndpoints. If you are using .NET 6 template, this call will be located in the main body of Program.cs class. Inside this call, locate the line with a call to MapGrpcService. We will replace this line with the following code:
endpoints.MapGrpcService<PerformanceMonitor>();
Note
If you are running your server-side application on a Mac, you will need to apply some modifications to it. Instructions on how to do so can be found in the Running a gRPC service on a Mac section of Chapter 1, Creating a Basic gRPC Application on ASP.NET Core.
Now, you can compile the application to ensure that we have added all the components correctly and haven’t missed anything. If so, we are ready to start adding our client application.
Setting up the client application
Our client application will be a standard ASP.NET Core web API. To create it from a relevant template, open your command-line terminal inside the GrpcBestPractices solution folder and execute the following command:
dotnet new webapi -o ApiGateway
Next, we will add it to our solution by executing the following command:
dotnet sln add ApiGateway/ApiGateway.csproj
After this, we will add all the required gRPC dependencies to our project. We will also add a NuGet package to give us access to Swagger. So, we will replace the content of ApiGateway.csproj with the following:
<Project Sdk="Microsoft.NET.Sdk.Web">
  <PropertyGroup>
    <TargetFramework>net5.0</TargetFramework>
  </PropertyGroup>
  <ItemGroup>
    <PackageReference Include="NSwag.AspNetCore" Version="13.12.1" />
  </ItemGroup>
  <ItemGroup>
    <ProjectReference Include="..\GrpcDependencies\GrpcDependencies.csproj" />
  </ItemGroup>
</Project>
The API endpoints of the application will return a JSON representation of the PerformanceStatusResponse message from our performance.proto file. We will also measure how long it takes to execute various types of calls. Therefore, the return object will also contain a field to store the time in milliseconds.
To represent the response object, we will create a ResponseModel.cs file in the root of our ApiGateway project and populate it with the following content:
using System.Collections.Generic;
namespace ApiGateway
{
    public class ResponseModel
    {
        public List<PerformanceStatusModel> PerformanceStatuses { get; } = new();
        public double RequestProcessingTime { get; set; }

        public class PerformanceStatusModel
        {
            public double CpuPercentageUsage { get; set; }
            public double MemoryUsage { get; set; }
            public int ProcessesRunning { get; set; }
            public int ActiveConnections { get; set; }
        }
    }
}
To demonstrate the importance of reusing a gRPC channel, we will set up three different types of clients in our application.
The first one will be a wrapper class, where a new client object is created every time a new call is made, but the channel remains active until the wrapper object is disposed of. This wrapper class will be inside the GrpcPerformanceClient.cs file, which we will place in the root of the ApiGateway project folder. Inside this file, we will place all the required using statements, namespace, and the class definition. So, it will look as follows initially:
using System;
using System.Threading.Tasks;
using Grpc.Net.Client;
using Performance;

namespace ApiGateway
{
    internal class GrpcPerformanceClient
    {
    }
}
Inside the namespace, we will add the interface definition for our class:
public interface IGrpcPerformanceClient
{
    Task<ResponseModel.PerformanceStatusModel> GetPerformanceStatus(string clientName);
}
Next, we will add a constructor to our class, which will set the client channel when it’s initialized:
private readonly GrpcChannel channel;

public GrpcPerformanceClient(string serverUrl)
{
    channel = GrpcChannel.ForAddress(serverUrl);
}
After this, we will ensure that our class implements both the IGrpcPerformanceClient and IDisposable interfaces. The class needs to implement the method that we have defined in the interface. Likewise, we need to ensure that we dispose of the channel once an instance of this class is destroyed. Therefore, we will change the class definition line to the following:
internal class GrpcPerformanceClient : IGrpcPerformanceClient, IDisposable
Now, let’s implement the IGrpcPerformanceClient interface by adding the following method to our class:
public async Task<ResponseModel.PerformanceStatusModel> GetPerformanceStatus(string clientName)
{
    var client = new Monitor.MonitorClient(channel);
    var response = await client.GetPerformanceAsync(new PerformanceStatusRequest
    {
        ClientName = clientName
    });

    return new ResponseModel.PerformanceStatusModel
    {
        CpuPercentageUsage = response.CpuPercentageUsage,
        MemoryUsage = response.MemoryUsage,
        ProcessesRunning = response.ProcessesRunning,
        ActiveConnections = response.ActiveConnections
    };
}
Then, we will implement an IDisposable interface by adding the following method to the class:
public void Dispose()
{
    channel.Dispose();
}
Now, we need to register this wrapper class alongside our other dependencies. So, we will apply some changes to the Startup.cs file, (or Program.cs file if you are on a .NET 6 template), which is located within the root of the ApiGateway project folder.
First, we will ensure that the class imports all the necessary namespaces. The full collection of using statements should be as follows:
using System;
using Microsoft.AspNetCore.Builder;
using Microsoft.AspNetCore.Hosting;
using Microsoft.Extensions.Configuration;
using Microsoft.Extensions.DependencyInjection;
using Microsoft.Extensions.Hosting;
using Performance;
Then, we will ensure that we inject all the necessary dependencies into our code by placing the following content inside the ConfigureServicesProgram.cs file before the Build event. And you will need to replace services with builder.Services:
services.AddControllers();
services.AddOpenApiDocument();
services.AddSingleton(Configuration);
services.AddSingleton<IGrpcPerformanceClient>(p =>
  new GrpcPerformanceClient(Configuration["ServerUrl"]));
services.AddGrpcClient<Monitor.MonitorClient>(o =>
{
    o.Address = new Uri(Configuration["ServerUrl"]);
});
Here, we are adding API controllers. Then, we are adding Swagger dependencies so that we can generate web pages based on REST API endpoints. Then, we are making the application configuration available to the other classes (we will need this to instantiate gRPC clients on demand). After this, we are registering an instance of our wrapper class that we have just created.
The final registration method, AddGrpcClient, is an in-built way to register a gRPC client inside the ASP.NET Core application without using any custom wrapper. If we have this registration call, then we can inject the client type (in this case, Monitor.MonitorClient) into the constructors of our controllers and it will get resolved to a functioning instance. This makes client registration more convenient. However, as we will see later, outsourcing client registration to the underlying framework doesn’t necessarily improve its performance.
Next, we will need to add Swagger elements to our pipeline. To do so, we will place the following lines into the configure method. They will need to be placed anywhere before the calls to UseRouting and UseHttpsRedirection:
app.UseOpenApi();
app.UseSwaggerUi3();
As you may have noticed, we have inserted the value of the ServerUrl element from our configuration. So, we will need to add it to our appsetting.json file. The value of the element will be the secure (HTTPS) application URL we defined in the applicationUrl element of the launchSettings.json file from the PerformanceService project. However, if you are running the gRPC service application on a Mac, you will need to use the HTTP URL. In my case, the URL is https://localhost:5001. So, let’s add the following field to the appsettings.json file of the ApiGateway project:
"ServerUrl": "https://localhost:5001"
Also, since we are adding a Swagger page to our project, we can make things easier for us by enabling automatic navigation to this page whenever the application is launched. To do so, open the launchSettings.json file in the ApiGateway project and replace the values of all the launchUrl elements with swagger.
Now, we are ready to add the controller that will provide the interface between the gRPC client and the outside world. Before we do this, we will remove any existing files from the Controllers folder inside the ApiGateway project. We won’t need them anymore. Then, we will create the PerformanceController.cs file inside this folder.
We will start by populating this file with the basic ASP.NET Core Web API controller
structure:
using System.Threading.Tasks;
using Grpc.Net.Client;
using Microsoft.AspNetCore.Mvc;
using Microsoft.Extensions.Configuration;
using Performance;

namespace ApiGateway.Controllers
{
    [ApiController]
    [Route("[controller]")]
    public class PerformanceController : ControllerBase
    {
    }
}
Then, we will add the constructor and the private fields:
private readonly Monitor.MonitorClient factoryClient;
private readonly IGrpcPerformanceClient clientWrapper;
private readonly string serverUrl;

public PerformanceController(Monitor.MonitorClient
  factoryClient,
  IGrpcPerformanceClient clientWrapper,
  IConfiguration configuration)
{
    this.factoryClient = factoryClient;
    this.clientWrapper = clientWrapper;
    serverUrl = configuration["ServerUrl"];
}
Here, we are inserting a dependency of IGrpcPerformanceClient – the gRPC client
wrapper that we created earlier. We are also inserting the Monitor.MonitorClient
instance, which we registered via AddGrpcClient in the Startup class (orProgram.cs file, depending on your platform version). Finally, we are inserting
configuration so that we can store the URL of the gRPC server for later.
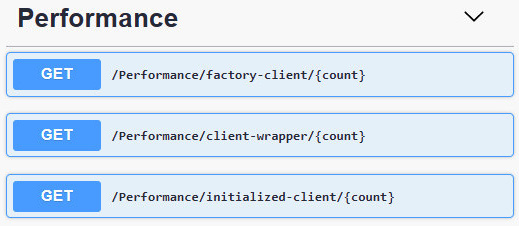
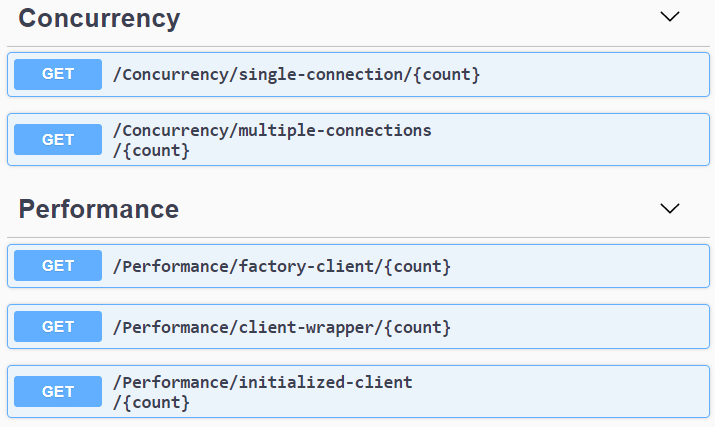
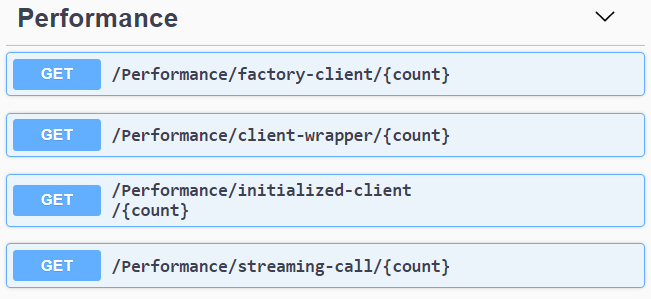
Now, let’s add three endpoints that have identical logical flows but use different gRPC
client types. We will start by adding an endpoint that uses the client that was created by
the internal factory method of ASP.NET Core. This method will look as follows:
[HttpGet("factory-client/{count}")]
public async Task<ResponseModel>
GetPerformanceFromFactoryClient(int count)
{
    var stopWatch = Stopwatch.StartNew();
    var response = new ResponseModel();

    for (var i = 0; i < count; i++)
    {
        var grpcResponse =
            await factoryClient.GetPerformanceAsync(new PerformanceStatusRequest { ClientName = $"client {i + 1}" });
        response.PerformanceStatuses.Add(new ResponseModel.PerformanceStatusModel
        {
            CpuPercentageUsage = grpcResponse.CpuPercentageUsage,
            MemoryUsage = grpcResponse.MemoryUsage,
            ProcessesRunning = grpcResponse.ProcessesRunning,
            ActiveConnections = grpcResponse.ActiveConnections
        });
    }

    response.RequestProcessingTime = stopWatch.ElapsedMilliseconds;
    return response;
}
What we have done here is accept a parameter containing a count of the gRPC calls we
are about to make. Then, we generate that many gRPC requests on the client that we have
inserted into our controller directly. The client is expected to reuse the channel, but we
don’t know how else it has been configured internally.
Now, let’s add an endpoint that uses the gRPC client wrapper, which will have the
following content:
[HttpGet("client-wrapper/{count}")]
public async Task<ResponseModel> GetPerformanceFromClientWrapper(int count)
{
    var stopWatch = Stopwatch.StartNew();
    var response = new ResponseModel();

    for (var i = 0; i < count; i++)
    {
        var grpcResponse = await clientWrapper.GetPerformanceStatus($"client {i + 1}");
        response.PerformanceStatuses.Add(grpcResponse);
    }

    response.RequestProcessingTime = stopWatch.ElapsedMilliseconds;
    return response;
}
The principle here is the same, but we are making all the gRPC calls via the wrapper that
we created previously. Here, we have full control over the gRPC client. We are reusing the
same channel between the calls but are creating a new client for every call.
Finally, we will add a method where we will be recreating a new instance of the gRPC
channel and the client every time we make a gRPC call:
[HttpGet("initialized-client/{count}")]
public async Task<ResponseModel> GetPerformanceFromNewClient(int count)
{
    var stopWatch = Stopwatch.StartNew();
    var response = new ResponseModel();

    for (var i = 0; i < count; i++)
    {
        using var channel = GrpcChannel.ForAddress(serverUrl);
        var client = new Monitor.MonitorClient(channel);
        var grpcResponse = await client.GetPerformanceAsync(new PerformanceStatusRequest { ClientName = $"client {i + 1}"});
        response.PerformanceStatuses.Add(new ResponseModel.PerformanceStatusModel
        {
            CpuPercentageUsage = grpcResponse.CpuPercentageUsage,
            MemoryUsage = grpcResponse.MemoryUsage,
            ProcessesRunning = grpcResponse.ProcessesRunning,
            ActiveConnections = grpcResponse.ActiveConnections
        });
    }

    response.RequestProcessingTime = stopWatch.ElapsedMilliseconds;
    return response;
}
Here, we are, once again, making a specified number of gRPC calls. However, we are also
creating a new channel and a new client for every call.
Now, we are in a position to launch our application and see which of the endpoints
performs best.
Comparing the performance of different client types
First, we need to launch the application that represents the gRPC server. To do so, execute the dotnet run command from the PerformanceService project folder. Then, execute the same command from the ApiGateway project folder.
Once both applications are running, navigate to the API gateway’s Swagger page in your browser. The address will be the secure URL from the launchUrl element of the launchSettings.json file of the ApiGateway project, followed by the /swagger path. For example, the URL that I have in my launchSettings file is https://localhost:36670. Therefore, the web page I need to access will be located at https://localhost:36670/swagger.
You will be presented with visual representations of all three endpoints that we have added
to the controller:
Now, let’s try each endpoint with the same count parameter to see how they perform. Let’s pick up a relatively high number – for example, 1,000 – and see how long it takes to process the request on each of the endpoints.
The best-performing endpoint will be the one that uses a client wrapper.
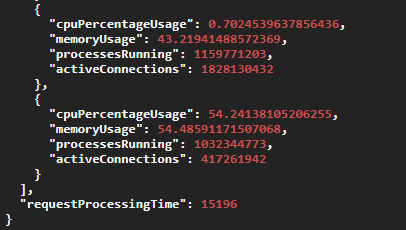
Unsurprisingly, the endpoint that creates a new gRPC channel for every call has performed worse. Unlike the client wrapper endpoint, which took approximately 15 seconds to execute, the endpoint that uses a new channel for every call took approximately 25 seconds:

However, the surprising outcome was that the client that was created by the framework had the worst performance. Even though it used the same channel for all its calls, it probably wasn’t configured optimally by the framework:
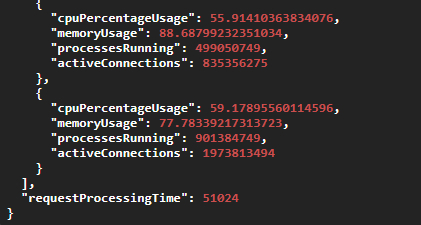
The conclusion is that reusing the gRPC channel on your client does improve performance. However, if you want to get the best performance, you need to control how you create your client as much as possible. You can outsource this task to the framework, which will mean that there will be less code to write. However, what you gain in convenience might be lost in terms of performance.
Reusing the gRPC channel on your client is just one of the ways of improving performance. There is also a limit on the number of streams that can be used at the same time inside the same server connection. And if this limit is exceeded, any additional calls need to be queued. But there is a way to work around this, which we will have a look at in the next section.
How to not get held up by a concurrent stream limit
The HTTP/2 connection that gRPC relies on has a limit on concurrent streams on a connection that can be applied at the same time. If this limit is exceeded, the subsequent calls cannot be made right away. They have to be queued.
The default concurrent connection limit is normally set to 100 streams. This can be configured on the server; however, this approach is not recommended. This can introduce separate performance issues, such as connection packet loss, resulting in all the TCP calls to the server being blocked. There can also be a conflict between different threads trying to write to the same connection.
The recommended way to work around this concurrent stream limit is to configure your client channel to open additional connections when the concurrency limit is exceeded. And this is easy enough to achieve using the .NET implementation of the gRPC client.
Configuring connection concurrency on the gRPC client
In this section, we will create a new controller with two endpoints that are identical to each other except for one detail: the gRPC client that’s used by one endpoint will have a default single-connection configuration applied, while the other client will be configured to open additional connections when needed.
In our ApiGatewayConcurrencyController.cs file inside the Controllers folder. First, let’s add the following content to this file:
using System.Collections.Generic;
using System.Diagnostics;
using System.Net.Http;
using System.Threading.Tasks;
using Grpc.Net.Client;
using Microsoft.AspNetCore.Mvc;
using Microsoft.Extensions.Configuration;
using Performance;

namespace ApiGateway.Controllers
{
    [ApiController]
    [Route("[controller]")]
    public class ConcurrencyController : ControllerBase
    {
    }
}
Now, let’s add the private member and the constructor to the class:
private readonly string serverUrl;

public ConcurrencyController(IConfiguration configuration)
{
    serverUrl = configuration["ServerUrl"];
}
Following this, we will add an endpoint that uses a standard gRPC client to make the specified number of concurrent gRPC calls to the server:
[HttpGet("single-connection/{count}")]
public ResponseModel GetDataFromSingleConnection(int count)
{
    using var channel = GrpcChannel.ForAddress(serverUrl);
    var stopWatch = Stopwatch.StartNew();
    var response = new ResponseModel();
    var concurrentJobs = new List<Task>();

    for (var i = 0; i < count; i++)
    {
        var client = new Monitor.MonitorClient(channel);
        concurrentJobs.Add(Task.Run(() =>
        {
            client.GetPerformance(new PerformanceStatusRequest
            {
                ClientName = $"client {i + 1}" });
            }));
    }

    Task.WaitAll(concurrentJobs.ToArray());
    response.RequestProcessingTime = stopWatch.ElapsedMilliseconds;
    return response;
}
We create this concurrency by generating as many tasks that are specified in the count parameter as quickly as possible.
Finally, we will add another endpoint, which has very similar logic but one notable difference, as highlighted in the following code block:
[HttpGet("multiple-connections/{count}")]
public ResponseModel GetDataFromMultipleConnections(int count)
{
    using var channel = GrpcChannel.ForAddress(serverUrl, new GrpcChannelOptions
    {
        HttpHandler = new SocketsHttpHandler
        {
            EnableMultipleHttp2Connections = true,
        }
    });

    var stopWatch = Stopwatch.StartNew();
    var response = new ResponseModel();
    var concurrentJobs = new List<Task>();

    for (var i = 0; i < count; i++)
    {
        concurrentJobs.Add(Task.Run(() =>
        {
            var client = new Monitor.MonitorClient(channel);
            client.GetPerformance(new PerformanceStatusRequest
            {
                ClientName = $"client {i + 1}"
            });
        }));
    }

    Task.WaitAll(concurrentJobs.ToArray());
    response.RequestProcessingTime = stopWatch. ElapsedMilliseconds;
    return response;
}
In this case, when we are creating the channel, we are passing the GrpcChannelOptions object into it. Inside this object, we are setting a custom HttpHandler. To allow our client to open additional connections when needed, we are setting this field to a new instance of SocketsHttpHandler. Then, we are setting its EnableMultipleHttp2Connections field to true.
This is all we need to do to make our client open additional HTTP/2 connections when needed. Now, let’s launch our application and test it.
Comparing the performance between a single
connection and multiple connections
We will launch both of our applications by running the dotnet run command inside
both the PerformanceService and ApiGateway project folders. Then, we will
navigate to the Swagger page of the ApiGateway application, where we should be able
to see our new concurrency controller endpoints:
This time, it may not be enough to run each endpoint once because when you use a high number, creating so many tasks may have a performance overhead. This is why, if you run each endpoint once, you may get overlapping numbers. However, this is still perhaps the simplest demonstration of concurrent calls. And, as such, it will still take advantage of multiple connection settings.
The best way to test the performance difference between these two endpoints is to run each of them multiple times and check the average. In my case, after running each endpoint 50 times, the average request processing time for a single-connection endpoint was around 35 seconds, while it was 30 seconds for a multiple-connections one. That’s not a huge difference, but it’s still significant.
Therefore, it makes sense to apply the EnableMultipleHttp2Connections setting to HttpHandler of the gRPC client if you expect many concurrent calls to be made by it.
Ensuring that your connection remains alive
Your application, which acts as a gRPC client, might experience prolonged periods of idleness where no gRPC calls are made to the server. In this period, your connection to the server may get interrupted. Therefore, while reusing a gRPC channel is good for performance, you need to ensure that the channel can still be used every time you need to rely on it.
Fortunately, ensuring that the connection remains alive is relatively easy to implement. To some extent, this functionality will already be configured by default. But you can also finetune it to suit your needs.
Setting up keep-alive pings on the gRPC client
Inside the ConcurrencyController class of the ApiGateway application, locate the GetDataFromMultipleConnections method. Inside this method, replace the initialization of the channel variable with the following code:
using var channel = GrpcChannel.ForAddress(serverUrl, new GrpcChannelOptions
{
    HttpHandler = new SocketsHttpHandler
    {
        PooledConnectionIdleTimeout = System.Threading.Timeout.InfiniteTimeSpan,
        KeepAlivePingDelay = TimeSpan.FromSeconds(60),
        KeepAlivePingTimeout = TimeSpan.FromSeconds(30),
        EnableMultipleHttp2Connections = true,
    }
});
We have retained the client’s ability to create new HTTP/2 connections whenever the concurrent stream limit is exceeded. However, we have also added several options to fine-tune keep-alive pings to make sure that the connection remains active. The PooledConnectionIdleTimeout setting controls how long a connection can be idle before it can be considered reusable. In our case, we have set it to an infinite time to keep the connection reserved.
KeepAlivePingDelay is a setting that controls the interval at which keep-alive pings are sent to the server. These pings are lightweight requests. Their purpose is to keep the connection active. In this case, they are sent every 60 seconds.
KeepAlivePingTimeout is a setting that controls the time window that the response from the keep-alive ping is expected to be received within. If nothing is received within this time window after sending the ping, the client will close the connection. The default value is 20 seconds, but in this example, we are setting it to 30 seconds.
The main performance benefit of correctly applied keep-alive ping settings is that these pings will keep your connection fresh. Your client will still work if you use it once the connection has been closed, but it will require establishing a new connection, which is almost equivalent to creating a new channel. And this is where the performance penalty comes from when you submit the first request after a period of inactivity.
But if the connection was kept alive all this time, it has already been fully prepared for you. When you make the first request after a period of inactivity, the client will not have to establish a new connection. You will be able to use a fully functioning connection in the same way as if the period of inactivity didn’t happen at all.
So, reusing your channels, opening additional connections for concurrent calls, and configuring keep-alive pings will improve your performance to an extent. But there is a way to improve your performance by an order of magnitude if you need to create communication-heavy applications. This is what we will have a look at now.
When streaming is better than individual calls
So far, we have only had one RPC in our solution. This was a unary RPC, GetPerformance, which is where we’ve been sending a single response message and retrieving a single request message. Having a unary RPC is acceptable in scenarios where it’s only meant to be called occasionally.
However, we haven’t been using it this way. We have been bombarding this endpoint with many repeated calls. And this is precisely the type of situation where a unary RPC is not the best tool for the job. A bi-directional streaming RPC would be a better option as it will improve our performance significantly.
Setting up a bi-directional streaming RPC
Let’s open the performance.proto file, which resides inside the Protos folder of the GrpcDependencies project. Now, add the following RPC to the Monitor service definition:
rpc GetManyPerformanceStats (stream PerformanceStatusRequest) returns (stream PerformanceStatusResponse);
This RPC uses the same request and response messages as GetPerformance, but it uses both of those inside streams.
Now, we need to implement this RPC definition on the server side. To do so, open the PerformanceMonitor class of the PerformanceService project and add the following method to it:
public override async Task GetManyPerformanceStats(IAsyncStreamReader<PerformanceStatusRequest> requestStream,
    IServerStreamWriter<PerformanceStatusResponse> responseStream,
    ServerCallContext context)
{
    while (await requestStream.MoveNext())
    {
        var randomNumberGenerator = new Random();
        await responseStream.WriteAsync(new PerformanceStatusResponse
        {
            CpuPercentageUsage = randomNumberGenerator.NextDouble() * 100,
            MemoryUsage = randomNumberGenerator.NextDouble() * 100,
            ProcessesRunning = randomNumberGenerator.Next(),
            ActiveConnections = randomNumberGenerator.Next()
        });
    }
}
In this method, we are doing a similar thing to what we have been doing in the GetPerformance method. But instead of just accepting a single request and sending back a single response, we read all the messages from the request stream. Then, for each of those, we write a response message into the response stream.
The principle remains the same – we process the request messages in the same order as they come in and we produce a response for every request. But we no longer have to make separate gRPC calls to process multiple messages.
Now, let’s make the necessary changes to our client. First, in the GrpcPerformanceClient.cs file of the
ApiGateway project, add the following using statements to the top of the file:
using System.Collections.Generic;
using Grpc.Core;
Following this, add the following method signature to the IGrpcPerformanceClient interface:
Task<IEnumerable<ResponseModel.PerformanceStatusModel>> GetPerformanceStatuses(IEnumerable<string> clientNames);
Now, we need to implement this method inside the GrpcPerformanceClient class. We will start by adding the method definition:
public async Task<IEnumerable<ResponseModel.PerformanceStatusModel>> GetPerformanceStatuses(IEnumerable<string> clientNames)
{
}
Now, let’s create a gRPC client from the existing channel and open a streaming call:
var client = new Monitor.MonitorClient(channel);
using var call = client.GetManyPerformanceStats();
var responses = new List<ResponseModel.PerformanceStatusModel>();
Following this, we will create an asynchronous task that will listen for any response messages being placed on the server stream. We will convert each of these messages into ResponseModel.PerformanceStatusModel and add it to the list of responses as soon as we receive it:
var readTask = Task.Run(async () =>
{
    await foreach (var response in call.ResponseStream.ReadAllAsync())
    {
        responses.Add(new ResponseModel.PerformanceStatusModel
        {
            CpuPercentageUsage = response.CpuPercentageUsage,
            MemoryUsage = response.MemoryUsage,
            ProcessesRunning = response.ProcessesRunning,
            ActiveConnections = response.ActiveConnections
        });
    }
});
Then, we must populate the client stream with a list of request messages that correspond to the collection of client names that we have received as the method parameter:
foreach (var clientName in clientNames)
{
    await call.RequestStream.WriteAsync(new PerformanceStatusRequest
    {
        ClientName = clientName
    });
}
Finally, we will close the client stream, wait for all the messages to be extracted from the
response stream, and return the collection of responses to the caller.
Now, let’s create an endpoint inside our PerformanceController class that will use
this method.
First, ensure that your PerformanceController.cs file contains the following
using statement:
using System.Collections.Generic;
Then, add the following method to the class:
[HttpGet("streaming-call/{count}")]
public async Task<ResponseModel> GetPerformanceFromStreamingCall(int count)
{
    var stopWatch = Stopwatch.StartNew();
    var response = new ResponseModel();
    var clientNames = new List<string>();

    for (var i = 0; i < count; i++)
    {
        clientNames.Add($"client {i + 1}");
    }

    response.PerformanceStatuses.AddRange(await clientWrapper.GetPerformanceStatuses(clientNames));
    response.RequestProcessingTime = stopWatch.ElapsedMilliseconds;
    return response;
}
This endpoint takes the same parameter as the other endpoints in this controller and returns the same object type. But this time, we are just making a single RPC call and populating the request stream with multiple messages. Let’s see how it performs compared to making a unary call multiple times.
Monitoring the performance of the bi-directional
streaming call
Launch both the PerformanceService and ApiGateway applications and navigate to the Swagger page of ApiGateway. You should be able to see the new streaming-call endpoint on the Performance controller:
Now, we will run this endpoint with the count parameter set to 1,000, as we did with the other endpoints before this:

Our call was fully processed in just over 3 seconds. This is five times faster than our previous fastest call, although we have submitted the same number of requests and have received the same number of response objects.
So, if you expect your gRPC application to process a large number of messages regularly – create streaming RPCs for them. They are faster than individual unary calls by a large margin.
There is also a modification you can apply to your Protobuf messages to transfer them faster due to the reduced bandwidth that they would require. This is what we will have a look at next.
Using binary payloads to decrease the data’s size
If you want to minimize a Profobuf message’s size while fitting as much data as possible into it, you can convert your data into a binary form. In Protobuf, there is a bytes data type that exists specifically for this.
Even though this data type is represented by the ByteString type from the Google.Protobuf library in C#, there are multiple ways of inserting a standard byte array into the fields of this type, which makes it compatible with any byte-processing functionality available in C#.
Let’s have a look at various ways of writing data into this field and reading data from it.
Adding binary fields to Protobuf
In the GrpcDependencies project, open the performance.proto file inside the Protos folder and add the following fields to the PerformanceStatusResponse message definition:
bytes data_load_1 = 5;
bytes data_load_2 = 6;
Now, let’s apply some modifications to the PerformanceMonitor class from the PerformanceService project. First, we will add the following using statement to the top of the file containing the class:
using Google.Protobuf;
Because both of the public endpoint methods will use similar functionality, we will refactor the class. First, we will add the following private method to it:
private PerformanceStatusResponse GetPerformaceResponse()
{
    var randomNumberGenerator = new Random();
    var dataLoad1 = new byte[100];
    var dataLoad2 = new byte[100];
    randomNumberGenerator.NextBytes(dataLoad1);
    randomNumberGenerator.NextBytes(dataLoad2);

    return new PerformanceStatusResponse
    {
        CpuPercentageUsage = randomNumberGenerator.NextDouble() * 100,
        MemoryUsage = randomNumberGenerator.NextDouble() * 100,
        ProcessesRunning = randomNumberGenerator.Next(),
        ActiveConnections = randomNumberGenerator.Next(),
        DataLoad1 = UnsafeByteOperations.UnsafeWrap(dataLoad1),
        DataLoad2 = ByteString.CopyFrom(dataLoad2)
    };
}
Now, we will change both public endpoint methods to the following:
public override Task<PerformanceStatusResponse> GetPerformance(PerformanceStatusRequest request,
    ServerCallContext context)
{
    return Task.FromResult(GetPerformaceResponse());
}

public override async Task GetManyPerformanceStats(IasyncStreamReader <PerformanceStatusRequest> requestStream,
    IServerStreamWriter <PerformanceStatusResponse> responseStream,
    ServerCallContext context)
{
    while (await requestStream.MoveNext())
    {
        await responseStream.WriteAsync(GetPerformaceResponse());
    }
}
So, to populate the two bytes fields that we’ve added, we are generating two byte arrays, each with a length of 100, and populating those with randomly generated bytes.
Then, we are using two different methods to write the data from these two byte arrays into the bytes fields:
- U
nsafeByteOperations.UnsafeWrap, which is similar to adding the byte array to aByteStringfield by reference. It’s not merely the data that gets copied. If you do anything to the original byte array after you’ve added it this way, modifying this array may corrupt the data. The advantage of using this method is that it’s faster than copying. ByteString.CopyFromcopies the original array into theByteStringfield. This method is safer but slower.
Now, let’s modify our client so that it can read the data.
First, we will add the following field to the PerformanceStatusModel class, which is nested inside the ResponseModel class of the ApiGateway project:
public byte[] DataLoad1 { get; set; }
public byte[] DataLoad2 { get; set; }
Now, let’s make some changes to the GrpcPerformanceClient class so that it can read the bytes data from the newly added fields. But first, we will need to add the following using statement to the top of the file containing the class:
using System.Runtime.InteropServices;
Now, let’s add the following private method to the class:
private ResponseModel.PerformanceStatusModel ReadResponse(PerformanceStatusResponse response)
{
    return new ResponseModel.PerformanceStatusModel
    {
        CpuPercentageUsage = response.CpuPercentageUsage,
        MemoryUsage = response.MemoryUsage,
        ProcessesRunning = response.ProcessesRunning,
        ActiveConnections = response.ActiveConnections,
        DataLoad1 = response.DataLoad1.ToByteArray(),
        DataLoad2 = MemoryMarshal.TryGetArray(response.DataLoad2.Memory, out var segment) ?
            segment.Array :
            response.DataLoad2.Memory.ToArray()
    };
}
Here, once again, we have two different ways of converting ByteString into a byte array:
ToByteArraywill convertByteStringinto a byte array.MemoryMarshal.TryGetArraywill try to obtain a specific array segment. If this fails, we can try to convert the read-only memory segment of theByteStringobject into the byte array by calling theToArraymethod.
Now, we can apply this private method to both of our public methods. In the GetPerformanceStatus method, change the return statement to the following:
return ReadResponse(response);
In the GetPerformanceStatuses method, replace the statement that starts with responses.Add with the following code:
responses.Add(ReadResponse(response));
Now, we can get this data on our Swagger page:
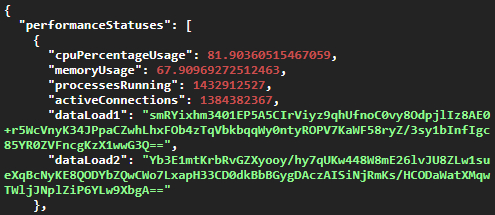
Even though we used raw bytes in this example, any kind of data can be packaged into this binary format. C# has a lot of in-built tools for working with bytes and converting them into other data types.
Summary
In this chapter, you learned that reusing existing gRPC channels is good for performance, while performance isn’t affected by reusing a client object. You also saw that even though it’s convenient to outsource the process of creating a gRPC client to the framework, this isn’t necessarily good for performance. Therefore, for optimal performance, it’s better to control how the client is created as much as possible.
We covered the fact that there is a streaming limit on active HTTP/2 connections. But you also learned that there is a setting that allows you to create a new connection from your gRPC client when this limit is about to be exceeded.
Then, we covered how to keep the gRPC connection between the client and the server alive while you aren’t actively using it. This allows you to start using it as soon as you need it without having to reestablish it.
After that, we learned how using bi-directional streaming instead of unary calls improves the processing speed by an order of magnitude when repeated calls need to be made. Finally, we covered how to transfer binary data in Protobuf messages, which significantly reduces the message’s size and minimizes the bandwidth usage.
In the next chapter, we will cover the best practices surrounding gRPC API versioning. You will learn how to update your server-side API in such a way that it doesn’t break the existing clients.
Questions
- For the best performance in terms of gRPC communication, which of the following client-side objects would you need to reuse?
A. Client
B. Channel
C. Both the client and the channel
D. Neither
- What is the default concurrent stream limit on the HTTP/2 connection?
A. 1,000
B. 10
C. 100
D. 1 - What happens if no data is received within the timeout window after sending
a keep-alive ping?
A. The connection is terminated
B. The next ping is sent
C. The connection is marked as idle
D. This configuration parameter is made redundant - How do you define a bi-directional streaming call in Protobuf?
A. Apply the stream keyword before the rpc keyword
B. Apply the stream keyword after the rpc keyword
C. Apply the stream keyword before the input parameter
D. Apply the stream keyword before both the input and output parameters - When shouldn’t you use UnsafeByteOperations.UnsafeWrap to populate ByteString?
A. When you intend to modify the original byte array after this call
B. You should be able to use it in any situation
C. When you haven’t made a copy of the original array
D. When you want higher performance
Further reading
Performance best practices for gRPC: https://docs.microsoft.com/en-us/aspnet/core/grpc/performance.