If you’ve read our previous article about making games in Scratch, you’ll know that games are an incredibly broad genre. Anything that has player input and an objective can be considered a game.
However, the vast majority of games include more than just these bare requirements. Every new and popular game is set in a world, usually made up of multiple levels. And lucky for us, the Scratch programming language allows us to easily create fun games with levels!
For guidance on how to create a simple game with only one level, we have a step-by-step coding tutorial for just that. We also have various Scratch video tutorials for various one-level games. These tutorials are perfect for beginner Scratchers and kids ages 8 and up.
But if you’re ready to jump into multi-level games, this article will show you step-by-step how to code multiple levels in Scratch for beginners!
Table of Contents
| What is a Level? | |
| Why should I add levels to my game? | |
| Types of Scratch Games that use Levels | |
| Step 1: Creating Levels in Scratch | * Visual Theme * Starting Place & Objective * Additional Features * Games with Maps |
| Step 2: Connecting Multiple Levels | * Using Message Broadcasting * Make several messages to broadcast * Check if the player has completed a level * Communicating level changes to sprites |
| What’s next? | * Advanced Level Switching Platformer Games |
| How to Keep Learning Scratch | * Scratch Coding Classes for Kids |
What is a Level?
To start off, a level is the space in your game that the player can explore while trying to complete an objective.
Collectively, a game’s world is composed of all of its levels in order. Objectives, hazards, walls, and the player itself all reside inside of a game’s levels. Simple games like snake use only one level, while more advanced games like Super Mario Bros and Sonic have many.
A good way to imagine game levels is as a set of challenges. Each level contains a set of obstacles that the player must overcome in order to complete an objective. While the objective remains the same across different levels, the challenge that each level presents is unique.
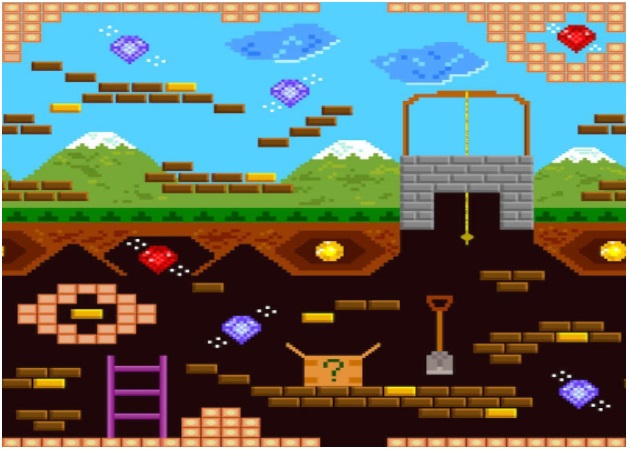
An example of a platformer game, with level-specific challenges!
For example, think about Super Mario games. The objective of each level is to reach the flagpole at the end. However, every level requires the player to complete a unique set of challenges such as jumping over spikes, avoiding enemies, and solving puzzles.
Why should I add levels to my game?
Adding levels to your game will take it to the next level — pun intended!
Multiple levels bring tons of different benefits that aren’t attainable in games with only a single level. In general, games with multiple levels are more fun to play, have lots of additional features, and tell better stories.
More Fun and More to Do
More levels means that the player has more things to do in your game. This makes your game last longer, and having more objectives makes your game more fun and engaging.
Additionally, the extra space that multiple levels brings gives you more room to experiment with extra features in your game. These features, in turn, will give the player of your game even more to do.
Better Game Narratives
Beyond simple gameplay mechanics, adding multiple levels to your game will give you an opportunity to tell better stories.
While a single level game like our mermaid collection game tells the story of a mermaid collecting pearls underwater, the scope of the story is limited to what you see on the screen.
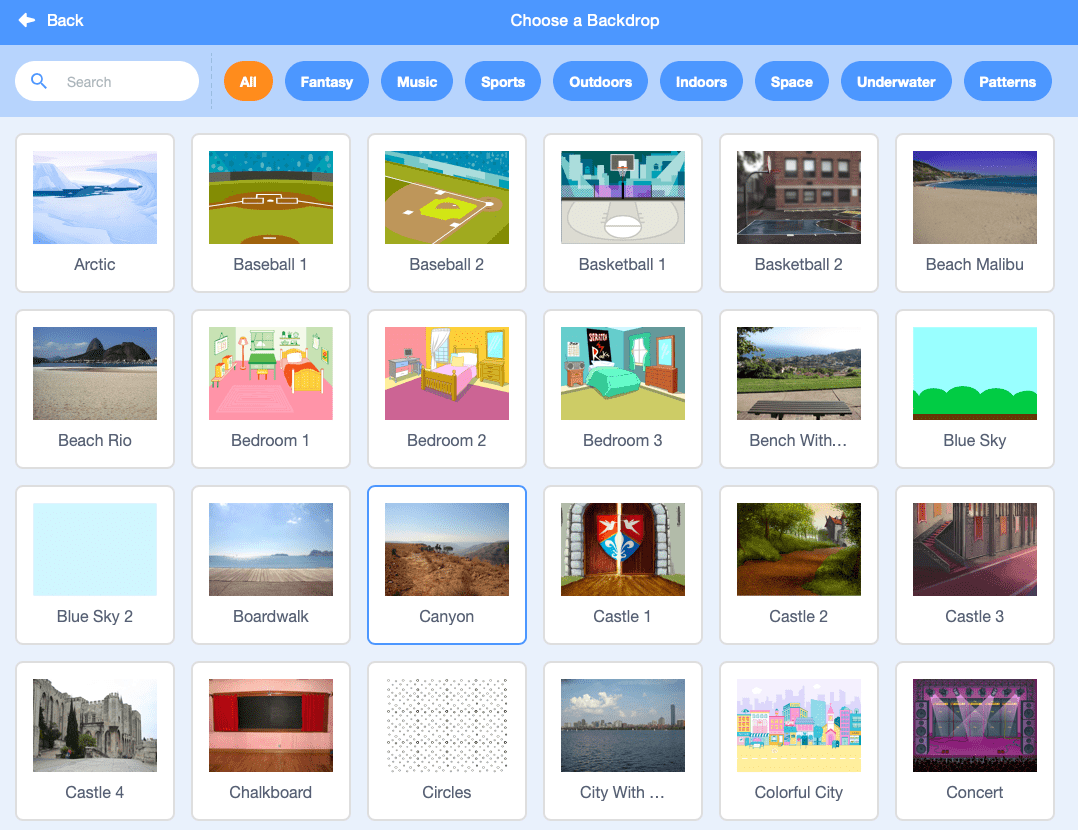
Take advantage of various Scratch backdrops, and span your game story across multiple level terrains and environments!
Adding multiple levels to this game could have our mermaid travelling all over the ocean, and maybe on land, to collect the world’s most valuable treasures.
Challenge Yourself as a Coder
Finally, learning how to code multiple levels in Scratch will simply make you a better programmer. The fundamentals behind multiple levels are applicable to all programming languages, so learning them on Scratch is a great place to start!
Now that we know more about what levels are and why they’re so cool, let’s take a look at some of the ways different games use levels to great success.
Types of Scratch Games that use Levels
As it turns out, every single game in Scratch uses at least one level!
Even simple collection games, like our mermaid game or Scratch Ocean Cleanup game, use exactly one level. It’s also possible to add multiple levels to any genre of game.
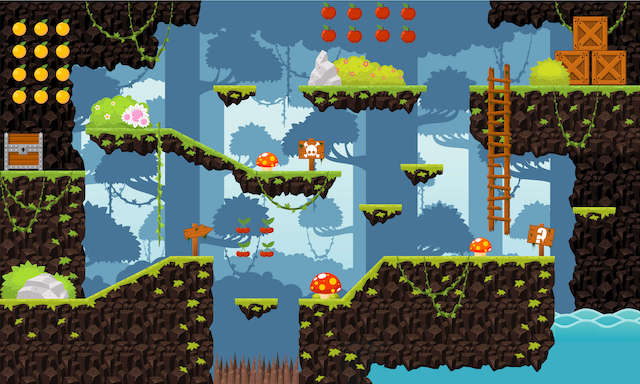
An example platformer Scratch game with levels.
While some games generally do not require levels (like Rock-Paper-Scissors), they can still be a fun addition to add in more flavor and excitement.
For example, if you were to make a Rock-Paper-Scissors game in Scratch, you could add multiple levels by creating multiple characters to play against. Once you defeat one character, you can move on to the next one — you can even change the background or add in more challenges!
While it’s possible to add levels to any type of game, we usually think of them as being used in several specific genres of Scratch projects. These types of games are by far the most popular genres in Scratch.
If you’re not sure what kind of game you want to make, try out one of these genres below!
| Maze Games | Objective: Navigate each level and get to the end. Characteristics: This is the easiest type of game to make with levels — start here first! What are levels in mazes?: Maze game levels can contain different obstacles, like enemies to dodge, keys to collect, or a confusing maze layout that’s hard to navigate! |
| Puzzle Games | Objective: Solve difficult puzzles, like trivia, riddles, or pretty much anything you can think of. Characteristics: This is a broad category of games, and perfect for getting creative. Check out the Scratch community for inspiration! What are levels in puzzle games?: Each level may have a different kind of puzzle, or increasingly harder versions of a puzzle! |
| Platformers | Objective: Navigate through difficult landscape by jumping over obstacles and using platforms to move forward. Characteristics: Platform games have realistic physics and gravity — such as famous games like Mario, Sonic, and Super Metroid. This is the most popular type of game on Scratch, but also the most difficult to code. We don’t recommend them for beginners! What are levels in platformers?: Get to the end of each level’s unique terrain to progress to the next level. |
Today’s DIY Maze Game with Levels
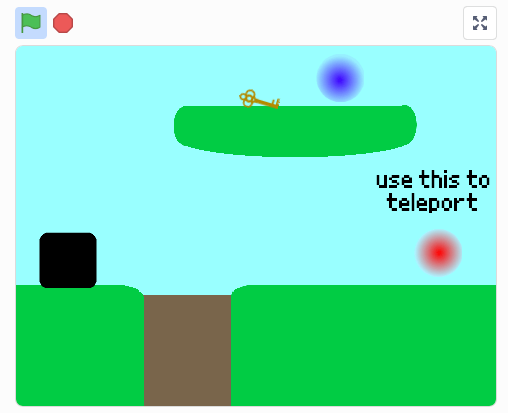
For this article, we will be adding levels to a maze game. Our game’s main obstacle is that the walls are deadly! This means that touching a wall will send you right back to the start of the level.
Here is the first level of our game. Click the green flag to play, and move the ball with your arrow keys to reach the square goal!
If you’re short on time, you can alternatively follow along by remixing this partially complete version of our own Scratch game. This will let you to get right into level design, without worrying about the basics.
Step 1: Creating Levels in Scratch
The steps to create a level can vary greatly, depending on what kind of game you decide to make.
For simple games without a specific layout, the process is actually pretty easy. This category of simple games includes basic collection, dodging, and puzzle games like the ones in our step by step game tutorial.
Step 1a. Visual Theme
Regardless of what kind of Scratch project you’re making, there are several components which you need to include in every level. Every level that you make in Scratch should fit inside of your game’s visual theme.
We discussed how to come up with a visual theme in our beginner Scratch game tutorial. If you recall, a visual theme is a combination of a game’s characters and setting.
Similar to single-level games, for multiple levels, you should make sure that the levels all fit inside of the same theme. More experienced Scratchers can subvert this expectation while still making a great game, but newer Scratchers should stick to this rule!
Step 1b. Starting Place & Objective
In addition to fitting inside of your game’s theme, there are several more technical things that every level needs to include. The most important of these is a starting place for your player, as well as your objective.

In our maze game, the player and objective are spacially separated.
This matters more for games with a set layout, but it’s still important for every game. In general, it’s best to have the player and objective start far away from each other. This will allow you to maximize the amount of the screen you’re using, and give you more space to add in fun extensions.
In our game above, the player and objective start on opposite sides of the screen. The way the level is laid out maximizes the amount of space used by forcing the player to walk around most of the screen to complete the objective.
Step 1c. Additional Features
The final technical aspect of levels is adding in additional features. This isn’t a requirement, but it’s the key to making games that are fun to play and code.
These extra features can vary greatly depending on the type of game you make. Some features you could add in include:
| Extra Features | What could this look like? |
| Coins | Coins can be something you collect to win! |
| Enemies | Avoid enemies to keep your character alive. |
| Moving platforms | Moving platforms can make it challenging to go across the level map. |
| Extra puzzles | Add extra difficulty with creative challenges the player must solve. |
| Secret Doors | Add a surprise or hidden element to the story! |
…Or anything else you can think of!
However, be careful to not go overboard.
A good tip is that levels should start simple, and get more complicated as you go. Let the player get used to what the game is like before overloading them with extra features.
Step 1d. For Games with Maps
If your game includes a “map” of any kind, creating a level will be a bit more involved.
A level map is a broad term used to define the world the player interacts with in a level. In a platformer game, the level map would be the ground the player walks on. In a maze game, the level map would be the actual maze the player is inside of.
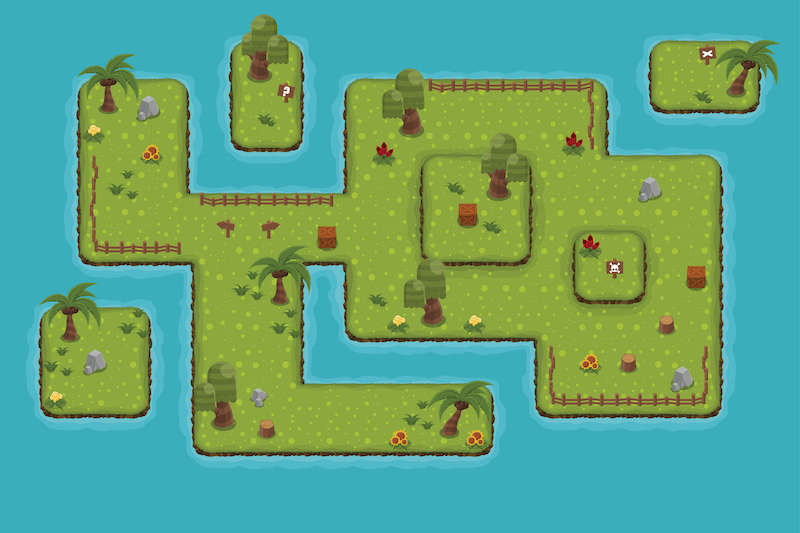
A level map defines the world a player interacts with in a level.
These maps usually involve collisions of some sort — this means that the player can stand on the ground, and can’t walk through walls. Since the game we’re making here is a maze game, each new level will have its own maze contained in its own level map.
How to Make a Level Map
In addition to all of the previous parts of levels, games with maps should have a new map for every level. In Scratch, the best way to make a map is to make a new sprite.
This new sprite can be called “map,” and each costume can be a map for the corresponding level. Our example game includes five levels, and each level has its own costume on the “map” sprite.

The best way to make a level map in Scratch is to make a new sprite.
This process is pretty much the same for all games which use levels. The only difference is what the actual maps look like. While working with maps, it can be easy to get sucked into the world of level design, and more broadly game design.
While game design is closely tied to computer science, it focuses less on the technicalities of programming and more on design fundamentals. If you’re interested in learning more about how to design a fun map, try looking into some game level design tutorials!
Step 2: Connecting Multiple Levels
Now that you’ve created several levels for your game, it’s time to learn how to connect them together. To make this work, we need to learn about a special feature of Scratch called message broadcasting.
Step 2a: Using Message Broadcasting
Message Broadcasting is the basic mechanic which we’re going to use to switch between levels. This feature in Scratch allows sprites to communicate with each other by broadcasting signals throughout the entire project.

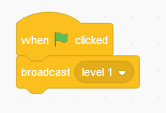
A yellow message broadcasting block in Scratch, under Events.
The block that broadcasts messages can be found under the Events tab. By clicking the drop-down menu, you can create a new message with any name that you want.
We’re going to create a message called “level 1”.

When this block runs, the sprite running it will broadcast the “level 1” message. We can use this message to tell our sprites to go to their proper place for level 1.
This message can be broadcast by any sprite you want! In our game, the “objective” sprite will be responsible for broadcasting most messages.
Keeping them in one place will make it easier to keep track of things in our game. Now level 1 will begin when the green flag is clicked.

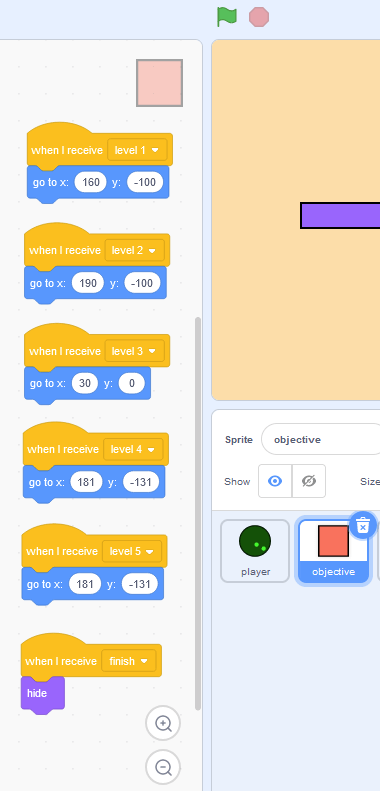
After broadcasting this message, sprites with the corresponding “when I receive” block will begin running their code.
In this example, when our main character receives the “level 1” broadcast, he will go to the position x: 160, y: 100 on the screen. This will ensure that they always start in the correct place for level 1!
These messages are kind of like our Scratch sprites talking to each other. One sprite of the game can say, “it’s time for the next level everyone!” and the other parts of the game will respond, “okay, I’ll go to the right spot!”
Communication is key!
Basic Level Switching
Now that we know about message broadcasting, we’re ready to utilize it in order to switch between levels in our game.
To begin with, try to do this with just two levels. If you follow our guidelines, it will be pretty easy to add more afterwards!
Step 2b: Make several messages to broadcast
To get started, make several new “messages” to broadcast. These messages will all be broadcast from our “objective” sprite:
- One new message for every level of your game (e.g. “level 1,” “level 2,” etc.)

- A message that tells your game to “switch levels”. This will be broadcast every time the player completes a level.

In addition to the “change levels” broadcast, we’re also going to use a “level” variable to keep track of what level the game is currently on. This variable will start out as “1,” then increase by one every time the player changes levels.
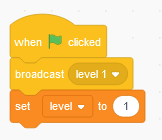
When the green flag is clicked, the game starts out on level 1. The “level” variable is set accordingly.
Step 2c: Check if the player has completed a level
Now, let’s add in the code to detect if the player has completed a level. In our game, a level is complete once the “player” sprite touches the “objective” sprite.

Here’s where the magic happens.
When the “change levels” signal is broadcast, a special block of code will run to find the proper level. Depending on the value of the “level” variable, our code will then broadcast a signal to switch to the corresponding level.
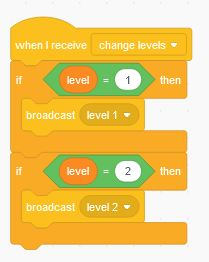
This is what your code should look like for 2 levels. To extend this, simply add in an additional “if… then” statement for every level in your game, as shown below.

Step 2d: Communicate the level change to all sprites
Now there’s only one step left!
After writing the “change levels” code, all we have to do is talk to each sprite and give it the correct instructions. Even though this is a simple step, it can still take lots of time to figure out exactly where everything should be.
In our game, the player has a different starting location for every level. That means that for every level, the player has to “go to” a different spot on the screen.

Let’s do the same for our objective, as well as any other sprites we have:
Finally, let’s tell the map to switch costumes. This is perhaps the most important step, as it’s this code which actually changes what the screen looks like.

Phew! That took a while.
But if you’ve followed all the steps, you should have fully functional levels! After setting everything up, it almost works like magic.
People can now play through your entire game seamlessly, without having to stop and manually switch between levels. Great job!
Congratulations! What’s next?
If you’ve successfully made a maze game with levels (try our final maze game with levels above), then congratulations! You’re on your way to becoming a Scratch veteran.
Levels are used in almost every popular game, so it’s a great skill to have under your belt. To continue learning and properly applying this skill, try to make a more advanced version of level switching in our upcoming tutorial.
If you haven’t done this already, a good next goal would be learning how to make a platformer game — further exploring level design, making sprites jump, and more advanced concepts like gravity.
Beyond platformers, there are tons of resources out there which have wonderful guides on programming and game design. For programming, check out our other articles on Scratch, or some more of our Scratch game tutorials.
Keep Learning: Scratch Coding Classes for Kids
For structured Scratch learning, Juni Learning offers project-based Scratch Courses for students 8-11 to get started with coding. Our Scratch curriculum prepares students with full mastery of the Scratch environment, and prepares them to advance into coding with more advanced, text-based languages like Python.

A Juni Instructor teaches Scratch to a student.
- Game Superstar (Scratch Level 1): introduces computer science fundamentals such and teaches students how to build and design their own Scratch games.
- Game Master (Scratch Level 2): covers more complex concepts like nested loops, complex conditionals, cloning and more in preparation for learning more advanced coding languages.
Read more about our coding curriculum, or learn more about kids coding classes with our Admissions Team to learn which course is best for your student’s coding journey.
This article originally appeared on junilearning.com.