
Having automated test coverage for our software apps is very important. Although manual tests sometimes have their place, automated tests allow us to verify the validity of our application logic much more efficiently than any manual tests would.
Automated tests also allow us to check if a change in one part of the codebase hasn’t accidentally broken anything anywhere else, which would be next to impossible to do manually in a complex application. While we add a test for any new functionality we implement (or even use the TDD approach to add the test before we implement the functionality), we will still have all the previously added tests for all the previous functionality we added.
Integration tests are a special category of automated tests that allow us to verify that the application, or a module, works as intended with other components. These types of tests may use real networks, real HTTP requests, real database connections, etc.
Traditionally, integration tests were fairly hard to apply to orchestrated distributed applications. This is because such applications have many moving components that have to be coordinated with each other. These components are typically computationally expensive; therefore integration tests are usually done to mimic a limited amount of inter-service interactions.
However, .NET Aspire solved this problem quite neatly. Its designers at Microsoft thought ahead of time about integration tests. Therefore, running integration tests against it is almost as easy as running low-level component/unit tests.
Moreover, Aspire even comes with a template for an integration testing project, so we don’t have to search the internet every time we need to add the tests to a new distributed application. This is what we will talk about today.
Setting up integration tests in Aspire
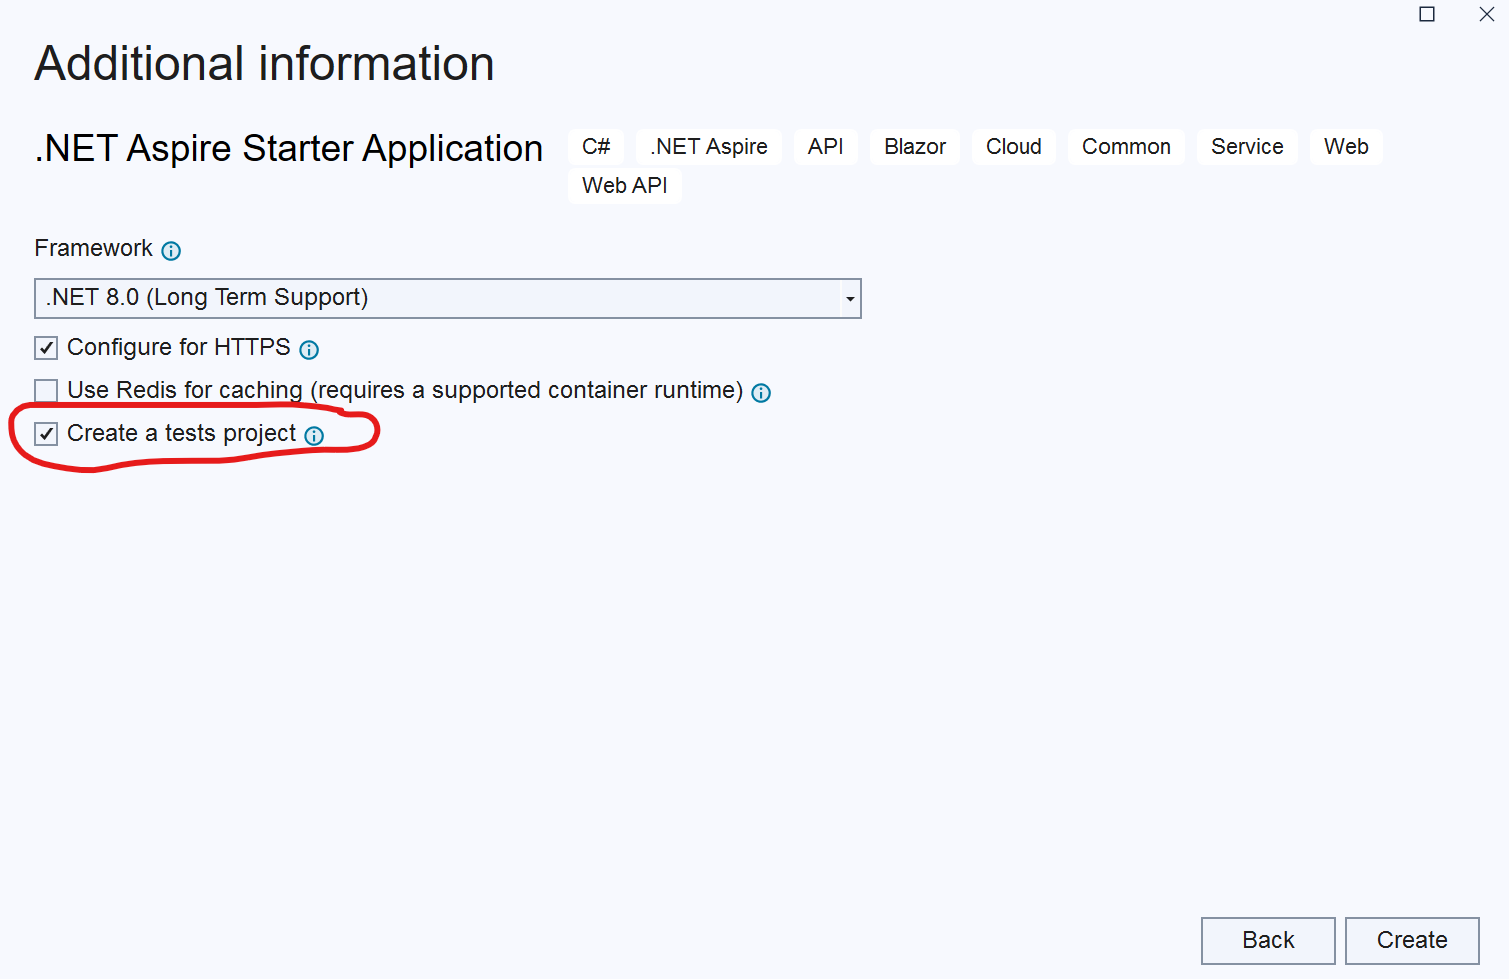
The easiest way to set up a test project is to select the Create test project option while creating a new Aspire Starter Project application in Visual Studio:
If you are a dotnet CLI user, you can execute the following command to create a new Aspire test project with all the dependencies:
dotnet new aspire-xunit
By default, the Aspire test project template uses xUnit. However, all the concepts we will discuss can also be implemented in NUnit and MSTest. Aspire testing libraries are framework-agnostic and will work with any of these.
We don’t even have to use the default test template. We can create a standard test project in .NET by using any of the testing frameworks and then install the dependencies specific to Aspire integration testing.
Installing Required Dependencies
In this GitHub repository, we have an example of an Aspire project created from the Aspire starter project template. It has a test project added, which is called AspireApp.Tests. If we open the AspireApp.Tests.csproj file, we will find the Aspire.Hosting.Testing NuGet package referenced there. This is the package with all the components required for Aspire integration testing.
The remaining packages referenced by the project are related to the testing framework and aren’t specific to Aspire. If we were to use a different testing framework, we would have seen different packages being referenced.
So, we have all the dependencies we need to start writing our tests. It would be a good idea to start with a test method provided by default when we create a new Aspire starter project. It’s simple enough to get our heads around, but it also demonstrates the core functionality of the Aspire test library.
Examining an Aspire test method
If we open the WebTests.cs file inside the AspireApp.Tests project, we will find the following test method there:
[Fact]
public async Task GetWebResourceRootReturnsOkStatusCode()
{
    // Arrange
    var appHost = await DistributedApplicationTestingBuilder
        .CreateAsync<Projects.AspireApp_AppHost>();
    await using var app = await appHost.BuildAsync();
    await app.StartAsync();

    // Act
    var httpClient = app.CreateHttpClient("webfrontend");
    var response = await httpClient.GetAsync("/");

    // Assert
    Assert.Equal(HttpStatusCode.OK, response.StatusCode);
}
This is a fairly standard example of the arrange-act-assert testing pattern. This pattern dictates that each test method contains these distinct sections:
- Arrange: We set up all the required services to run our test.
- Act: We perform the action that we are testing.
- Assert: We verify the outcomes of this action.
In this example (and as it’s commonly applied in C#), we mark each section with a comment to make the test method as easy to understand as possible.
Let’s go through this method line by line to understand what it’s doing. The first action we take is the following:
var appHost = await DistributedApplicationTestingBuilder
        .CreateAsync<Projects.AspireApp_AppHost>();
This expression uses the DistributedApplicationTestingBuilder type from the Aspire.Hosting.Testing library. We invoke the static CreateAsync<T>() method to initialize a distributed and orchestrated Aspire application.
The type we specify when we invoke this method is Projects.AspireApp_AppHost, which is the automatically generated representation of our Aspire Host project. We are, essentially, creating a test version of our entire Aspire application.
We don’t need to delve too deep into the difference between the test host and a normal host, but what is helpful to know is that the test host is much more lightweight. But don’t be deceived by the fact it’s lightweight. We will still be able to test all the core functionality of our Aspire app and how its orchestrated services interoperate with one another. The test version of the host still uses real networking and other real dependencies.
In the next two lines, we build the host and start it:
await using var app = await appHost.BuildAsync();
await app.StartAsync();
Please note that we are wrapping up the app object (which represents the whole Aspire app) in a using scope. This is because it’s a disposable object that relies on various unmanaged resources, such as network connections. As soon as the code exits the using scope, it cleanly disposes of these resources.
The next expression we have is this:
var httpClient = app.CreateHttpClient("webfrontend");
This expression creates an instance of a HttpClient class from the Aspire test host. Because we create it from the Aspire host, we use Aspire service discovery to set its base URL. In this example, we register a Blazor app under the name of webfrontend. Our HTTP client will be configured with the base URL of that app.
Next, we send a GET HTTP request to the base address of the app, which is denoted with the forward slash:
var response = await httpClient.GetAsync("/");
Finally, we verify that we received the OK (200) response:
Assert.Equal(HttpStatusCode.OK, response.StatusCode);
This was our overview of a basic example test method implemented by using xUnit. Let’s now see how the same method can be implemented by using alternative testing frameworks.
Using different testing frameworks
If we wanted to use NUnit instead of xUnit, our test method would look like this:
[Test]
public async Task GetWebResourceRootReturnsOkStatusCode()
{
    // Arrange
    var appHost = await DistributedApplicationTestingBuilder
        .CreateAsync<Projects.AspireApp_AppHost>();
    await using var app = await appHost.BuildAsync();
    await app.StartAsync();

    // Act
    var httpClient = app.CreateHttpClient("webfrontend");
    var response = await httpClient.GetAsync("/");

    // Assert
    Assert.AreEqual(HttpStatusCode.OK, response.StatusCode);
}
The main difference between xUnit and NUnit in this case is the use of [Test] instead of [Fact] and Assert.AreEqual() instead of Assert.Equal(). Otherwise, the structure and logic of the test remain the same.
If our preferred testing framework is MSTest, the method would look like this:
[TestMethod]
public async Task GetWebResourceRootReturnsOkStatusCode()
{
    // Arrange
    var appHost = await DistributedApplicationTestingBuilder
        .CreateAsync<Projects.AspireApp_AppHost>();
    await using var app = await appHost.BuildAsync();
    await app.StartAsync();

    // Act
    var httpClient = app.CreateHttpClient("webfrontend");
    var response = await httpClient.GetAsync("/");

    // Assert
    Assert.AreEqual(HttpStatusCode.OK, response.StatusCode);
}
In MSTest, the attribute [TestMethod] is used to indicate a test method. The assertion is done using Assert.AreEqual(), similar to NUnit. The rest of the test remains consistent with the structure and logic of the original test.
Expanding test functionality
One thing you may have noticed about the test method we looked at is that it’s very simple. It is so simple, in fact, that it probably has very limited usefulness. All we are doing is sending a very basic HTTP request to the homepage of the application and verifying that we receive the 200 response code.
One way we can improve the test is by looking at the content returned in the response. This applies to both in-browser applications with a user interface and headless API applications. There are many ways to do it in .NET and each methodology has its pros and cons.
We will use the AngleSharp NuGet package that allows us to parse HTML on web pages and easily search through its content. Once we referenced this NuGet package from our test project, we can create the following helper class with a method that will allow us to read the HTTP response object and parse its content:
using AngleSharp;
using AngleSharp.Html.Dom;
using AngleSharp.Io;
using System.Net.Http.Headers;

namespace AspireApp.Tests.Helpers;

public class HtmlHelpers
{
    public static async Task<IHtmlDocument> GetDocumentAsync(HttpResponseMessage response)
    {
        var content = await response.Content.ReadAsStringAsync();
        var document = await BrowsingContext.New()
            .OpenAsync(ResponseFactory, CancellationToken.None);
        return (IHtmlDocument)document;

        void ResponseFactory(VirtualResponse htmlResponse)
        {
            htmlResponse
                .Address(response.RequestMessage.RequestUri)
                .Status(response.StatusCode);

                MapHeaders(response.Headers);
                MapHeaders(response.Content.Headers);

                htmlResponse.Content(content);

                void MapHeaders(HttpHeaders headers)
                {
                    foreach (var header in headers)
                    {
                        foreach (var value in header.Value)
                        {
                            htmlResponse.Header(header.Key, value);
                        }
                     }
                 }
         }
    }
}
Our distributed Aspire app is set up in such a way that a Blazor application fetches data from a separate REST API application to populate its weather page:
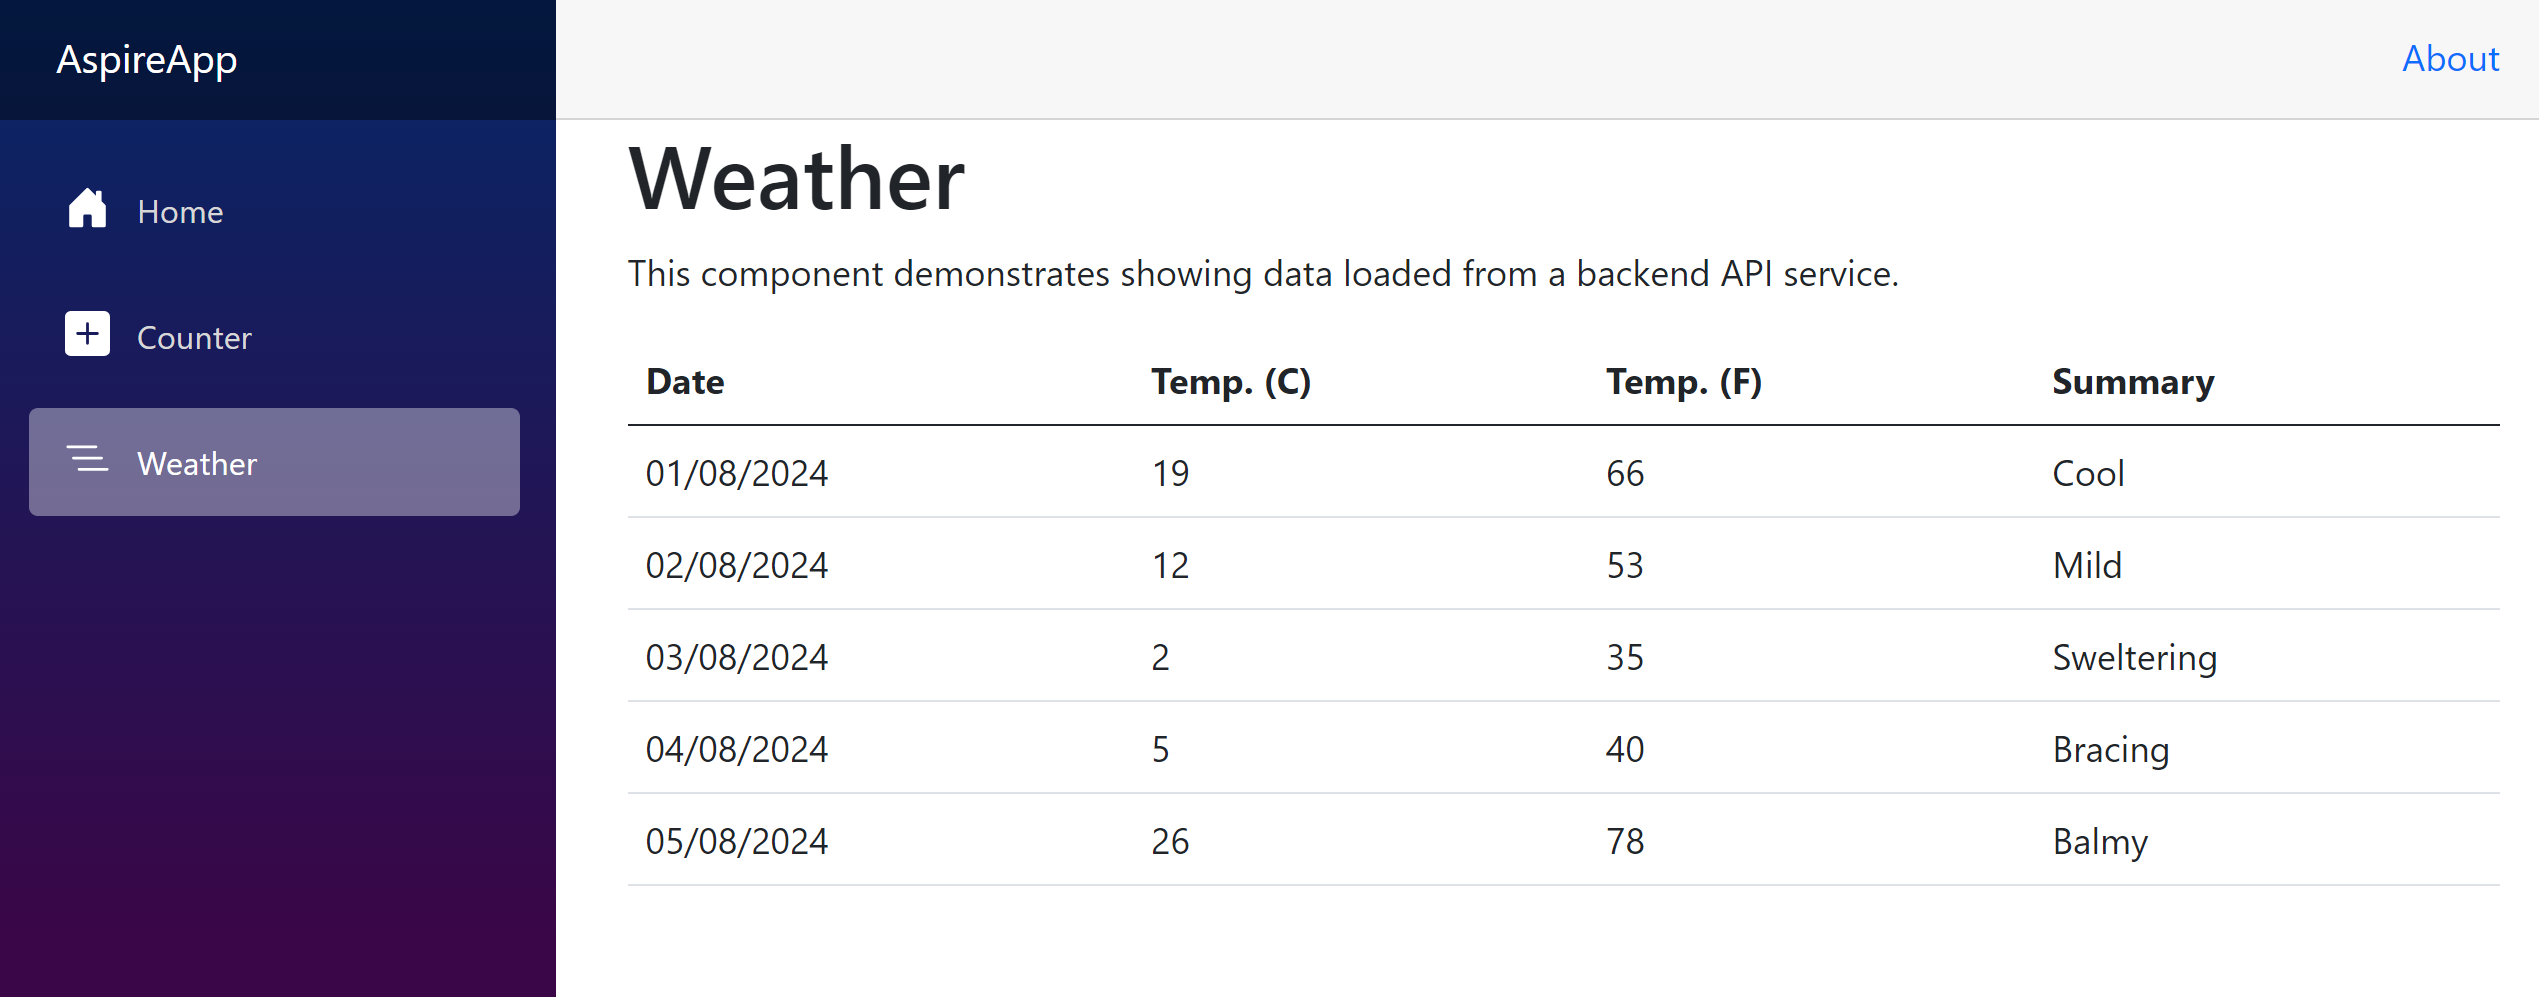
Let’s write a test to see if the weather page has the content we expect to see:
[Fact]
public async Task GetWeatherReturnsRightContent()
{
    // Arrange
    var appHost = await DistributedApplicationTestingBuilder
        .CreateAsync<Projects.AspireApp_AppHost>();
    await using var app = await appHost.BuildAsync();
    await app.StartAsync();

    // Act
    var httpClient = app.CreateHttpClient("webfrontend");

    var response = await httpClient.GetAsync("/weather");
    var responseBody = await HtmlHelpers.GetDocumentAsync(response);
    var descriptionElement = responseBody.QuerySelector("p");

    // Assert
    Assert.Equal(HttpStatusCode.OK, response.StatusCode);
    Assert.NotNull(descriptionElement);
    Assert.Equal(
        "This component demonstrates showing data loaded from a backend API service.",
    descriptionElement.InnerHtml);
}
In this test method, we aren’t simply checking whether the page exists and returns an appropriate response code. We also read the content of the page by passing it to the helper method we created earlier. Then we search for the first p HTML element and check whether its content is This component demonstrates showing data loaded from a backend API service.
Now, our test is much more useful.
What about component testing?
While integration tests are beneficial and we would probably need them in distributed applications, we could also benefit from testing individual components. These types of tests are much faster since they don’t rely on any real networking. They test the code directly.
One of the best ways to write component tests against a Blazor application is by using the Bunit NuGet package. This package is even endorsed by Microsoft and is mentioned on its pages, although it’s made by the open-source community.
We will need to install two NuGet packages in our application: Bunit and Bunit.TestDoubles. Now, let’s see how this package can be used for testing this page:
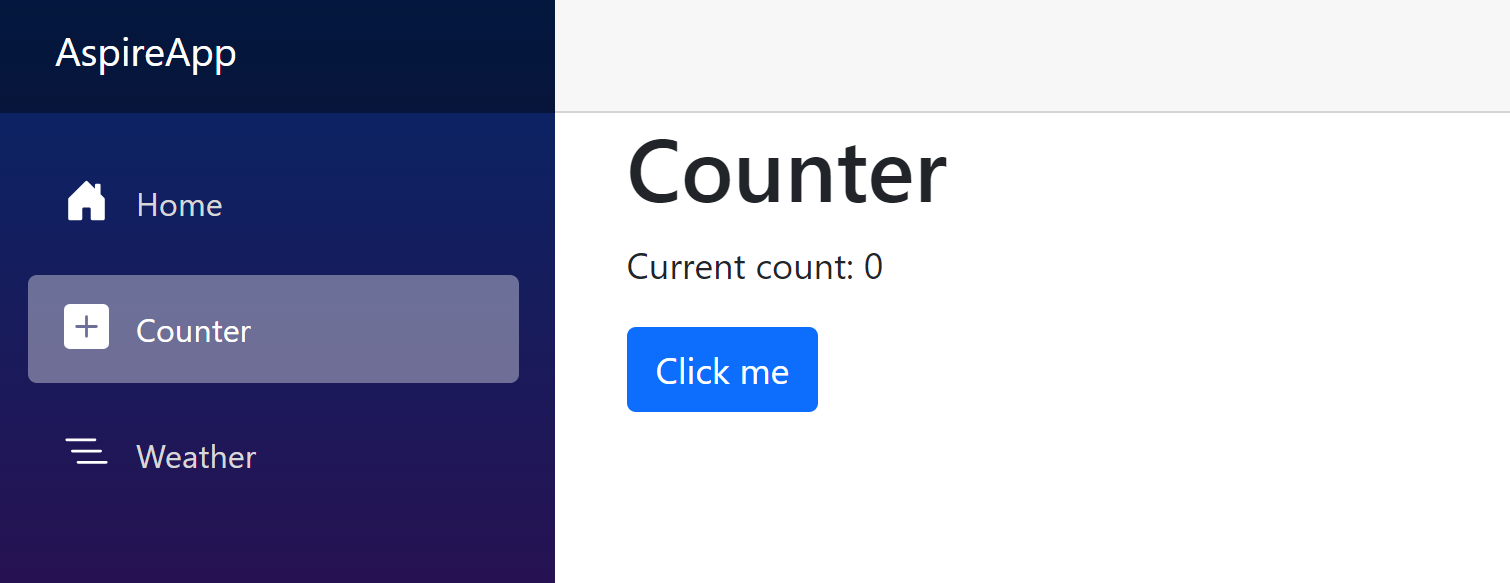
This is a standard Counter page from the Blazor project template. It has a button that increments the count on the screen when clicked. We can use Bunit to test this functionality. Here are the tests we wrote for it:
public class CounterTests : BunitTestContext
{
    [Fact]
    public void CounterStartsAtZero()
    {
        // Arrange
        var cut = RenderComponent<Counter>();

        // Assert
        cut.Find("p")
            .MarkupMatches(
                "<p role=\"status\">Current count: 0</p>");
    }

    [Fact]
    public void ClickingButtonIncrementsCounter()
    {
        // Arrange
        var cut = RenderComponent<Counter>();

        // Act
        cut.Find("button").Click();

        // Assert
        cut.Find("p")
            .MarkupMatches(
                "<p role=\"status\">Current count: 1</p>");
    }
}
The first test method, CounterStartsAtZero(), checks that the initial counter value is zero. It does it by directly rendering the Counter component and checking that the corresponding HTML contains 0 as the count value.
The other test method, ClickingButtonIncrementsCounter(), checks that the counter gets incremented when the button is clicked.
Wrapping up
.NET Aspire doesn’t only allow developers to build distributed orchestrated applications relatively easily compared to other equivalent technologies, but it also makes it easy to write integration tests against these applications.
Next time, we will talk about securing Aspire applications. We will talk about securing both the dashboard and the hosted apps, so watch this space.
P.S. If you want me to help you improve your software development skills, you can check out my courses and my books. You can also book me for one-on-one mentorship.